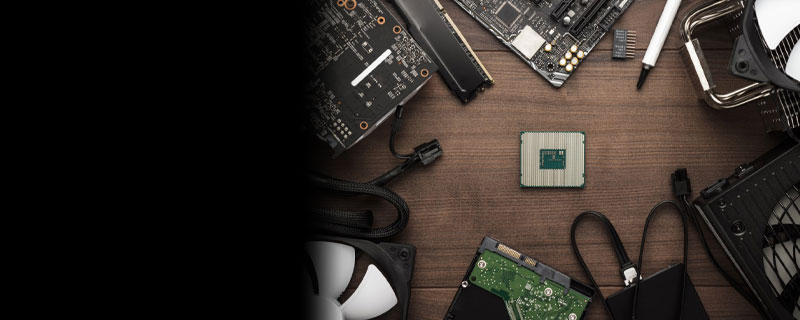

I have been building PCs for a long time. My first was a 386 and I have not stopped. Below are some tips and tricks I have picked up over the years that will make building your first or one hundredth PC easier.
Plan Before You Buy
This is often the most overlooked step when it comes to people building their first PC. They read a few reviews, throw their max budget into the cart and rush to complete their order. They then end up having to order additional items or realize they under or overspent on hardware.
First, determine what the PC will be used for. Simple web browsing and media consumption, PC Gaming, high end work loads or even a small family file server? Or perhaps all of these usages.
Be specific in your definition of what your usage needs are. For example, if you’re building a PC Gaming rig, do you plan to game at 1080P or 1440P? Will you be playing Esports, FPS, RPG Strategy gaming or something else? (The type of game can determine how much horsepower you need) Also once you know the resolution, think about the monitor refresh rate. A high refresh monitor will allow higher frame rates.
Have a clear understanding of your final project goals BEFORE you ever buy your first part.
Remember the Extras
You ordered your computer parts, and are now waiting for them to arrive, you’re all set right? Not quite yet… Make sure you have also ordered any extras you might need.
PSU Extension Cables are a great way to ensure you have enough cable for proper routing and can be bought fully sleeved to give your finished PC a really clean look. Also look at extension cables for other connections, such as the front panel.
Pro Tip: Pick up a USB Header Extension cable, the 4/5 pin layout of the USB header is the same layout of 99% of motherboard front panel headers. This is much easier to plug into the motherboard and now the case cables can plug into an easy to access header.
Next is to look at plug adaptors. Right angle adapters for your motherboard power, USB headers and GPU power can help a lot with making a clean build.
While you’re looking at extension cables and the inside of your case, do not forget the outside of the build as well. USB extension cables and even DP or HDMI extension cables might help depending on the way your final build will be set up in your home.
Finally, do not forget the OS. I know it is not what you might consider an “extra” but all too often people leave it out of their builds when they budget. Make sure you have the OS to ensure your build is up and ready to go. If your budget is too tight, you can still download and install the OS from Microsoft but when you put it in just do not enter a product code. You will be functional with some limitations, but it can get you up and running until you can afford the OS.
Let's Start Building
Alright so you have made it to the point your parts have arrived. I know with the extras I mentioned you might have blown your initial budget or forced changes in parts selection but trust me, getting everything at once makes the build experience a lot better. Nothing is worse than getting halfway into a build and being forced to wait as you had to order something you forgot.
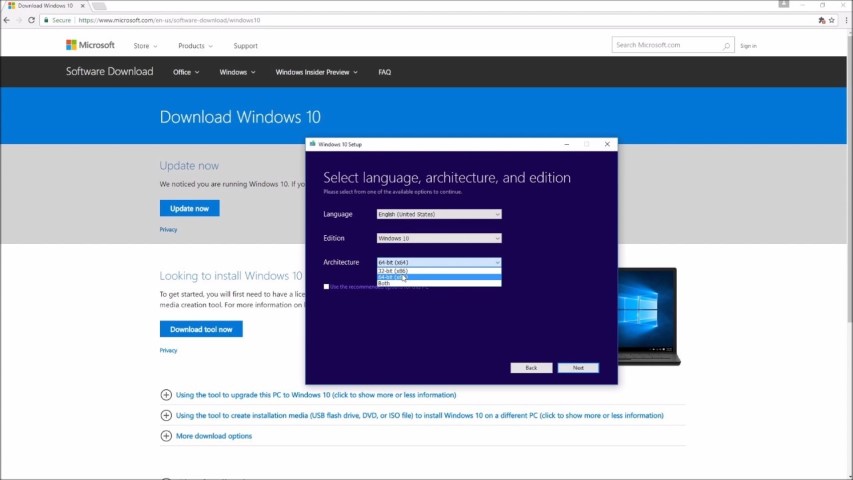
Before you start the build, lets prepare your OS media. Microsoft makes it easy to create a USB boot device to install the latest version of the OS. Download this using their Media Creation Tool. Run this app on a PC connected to the Internet and it will pull down the latest install of Windows as well as make the USB disk bootable. Once this is finished, visit the website of the manufacturer for your Motherboard, download the latest drivers and put them on the same USB stick. Then, go to AMD’s website and download the latest GPU drivers.
As you start the build, be sure to slow down a bit. I know you are excited to get everything into the case and start using your new PC. However, taking a little longer now could save you a ton of headaches down the road.
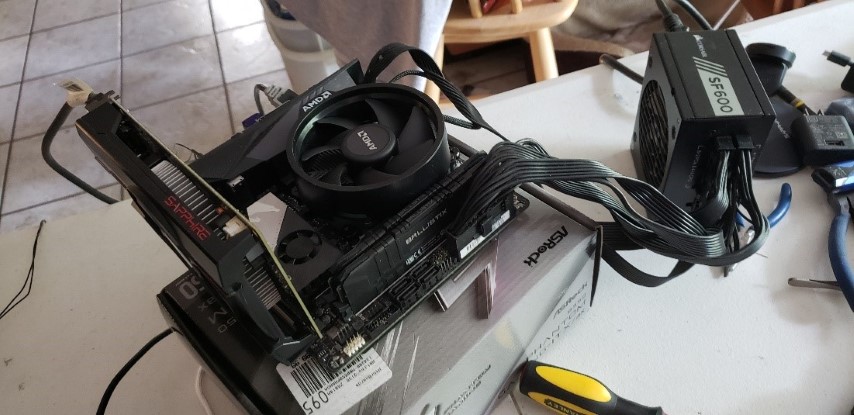
Pro Tip: Do a dry build first, do not put anything in the case. Use your motherboard box as a platform and build the base components outside the case. Motherboard, CPU, RAM, storage, GPU and PSU should all be attached and tested before building in the case. Install the OS during this stage, do not worry about drivers and tweaking, leave everything at defaults and make sure the system is running okay.
As mentioned in the tip above, do not rush to build in your new (or old) case. Any experienced PC builder will tell you a dry run is an important step. It can be frustrating to have a build fully done only to find out you must take it apart because of a bad component.
Do not do any tweaking, many people rush to turn on memory profiles or even overclock the components when they are still in the building process… WAIT. You need a baseline to work from to help make a diagnosis. This will mean your system will be a little slower at first but that is okay, you want to initially build the system and ensure the parts are okay. By doing this base line, as you tweak if an issue comes up, it is now easier to find the reason.
Once you have the system with OS installed and it appears to be stable, it is time to move the system into its new home. Take your time and make sure you have the cabling run the way you want it. If you are using cable extensions, as I mentioned above, plug them in before installing parts and move them to the places you need them for cable management. Once the parts are fully installed you can now plug the PSU into the extensions.
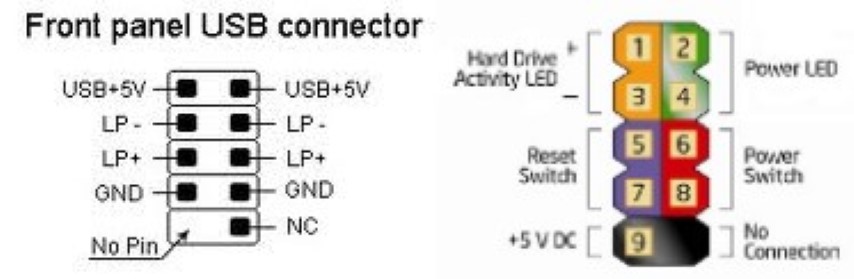
As you do the build, make sure to double check each step of the way. Look for things like ensuring the I/O shield is installed, nothing as frustrating as doing the full build and needing to tear it down because you forgot the I/O shield.
All Built, Now What?
The system is all built, and everything is working. You should now be looking at the Windows Desktop on your screen. Next you need to make sure that Windows is fully up to date. Most network systems on the motherboard have drivers already in Windows. If your network is not yet enabled then install the needed drivers.
Once you’re on the internet make sure to have Windows check for all updates and let Windows do its thing. Once fully updated, now install any drivers for the Motherboard and GPU.
Pro Tip: A lot of people will tell you to do BIOS updates on the motherboard. A good rule of thumb is if it is not broken then do not fix it. If the system is stable and working well then there is no reason to update the BIOS. If you needed a BIOS update, then that would have been done much earlier in the build process.
With the drivers fully installed and the OS updated, now you should do some testing to again ensure stability. This will tell us if you have a bad driver install or an update that is causing an issue. You might want to do some stress testing now as well. The idea of stress testing is to see if you can make the PC break when pushed to the maximum. Do not use stress testing as your benchmark to see how your system is cooling, stress testing creates an unrealistic load that is seldom if ever seen in everyday use. There are numerous tools to do this, pick those you like the most.
Time to Tweak
Once you have established a stable system with baseline settings, now is the time to tweak. You can begin to bring up the performance. I am not a huge proponent of overclocking, so my tweaking guide here is fairly limited.
Let’s begin with a simple tweak that can give you a decent performance boost, enable XMP on your memory. Go into your BIOS and find the memory settings, then just enable XMP and the BIOS should begin running your memory at its rated speeds.
Before doing any further tweaking, use your system for a few hours to ensure it is still stable. This will be your mantra going forward. Every time you make a change, spend some time using the system to ensure system stability. By doing this as you tweak the performance of the system, you can see if the tweak creates an issue and know exactly what caused the issue if one arises.
Once you have the memory tweaked in, for an AMD Ryzen 5000 series system, the next tweak I suggest is the Curve Optimizer. I will not go over details here as there are many GREAT videos showing exactly how to do this. This little tweak will give a small performance bump, while lowering in some cases the power draw of the PC.
There are many other tweaks out there from overclocking to under-volting. Find the ones that interest you. Again, between each tweak, stop and use the system for a few hours, as you want to ensure that the tweak did not create an instability in the system.
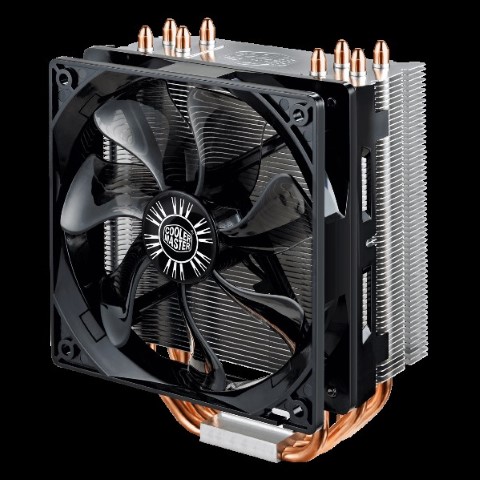
The last tweak I perform is with the cooling of the system. With the overclocking and stuff now done it is time to make my system as quiet as possible. For this I have a few quick tricks that have never failed me. First set the CPU cooler to silent in the BIOS. If I have provided an adequate cooler for the CPU I am using and the tweaking I have done to it, then this will result in a very quiet system with temps staying under throttling. Remember I mentioned I do not overclock, so this is easier for me. I do however buy aftermarket coolers to get the decent cooling and lower noise, as most stock CPU coolers are just not up to the task of doing both.
Pro Tip: If you’re not going to push a heavy overclock, then do not overspend. At stock speeds most CPUs can easily be cooled with $50 or less air coolers. Coolers such as the Hyper 212, Vetroo V5, Scythe Big Shuriken 3 and ID-COOLING SE-224-XT can keep most CPUs well under throttling with quiet operation. Pick the cooler that best fits your case design.
Once the CPU cooler is tweaked, you now tweak the case fans. Many people put these on a curve using PWM from the motherboard. I personally have never found a need. Using a PWM fan I set the fan speed to static and find the highest speed I can attain without noise being an issue. This will be a personal choice as some people can handle more noise (noisy room) and some need quieter operation. Tweak this in for your level of tolerance. This can be done in the BIOS by setting a flat fan curve for the fans with a pickup tick at extreme temps if needed. The end result will be a quiet system that handles the heat well.
If you have 3 pin fans for your case then you have couple of control options. Some motherboards offer hybrid control headers that will work on 3 pin or PWM. If yours does not then you can buy quiet extensions that lower the voltage of the fans, these usually come in 7 and 5 volts. I have personally found 7 volt works well. The last option costs a little more but can give you good control by buying a fan controller. This box will allow you fine control on individual fan speeds and some options for curve optimization as well if that is your choice of control.
You might have noticed I have not mentioned tweaking the GPU. The reason is that I have found Sapphire GPUs work well at stock settings. We work hard to ensure our cards are optimized for performance, temps well under throttle and quiet operation out of the box. If you do need to tweak or just want to, Radeon Software offers some good options for under-volting and fan curve.
The Final Test
The tweaking is done, and now comes the final test. While many will tell you to grab some stress test software or benchmarking tool, I personally find it boring to sit there and wait for those tests to finish. Let’s test our new system in a way that is fun. Find the most demanding game you enjoy and set down for a two- or three-hour play session. This will stress your system in a real-world usage scenario and at the same time allow you to enjoy your system.
If you have done your work right and made sure to check basic stability each step along the way then your system should be cool, quiet, and stable. The best part is if someone asks about the long gaming session you can tell them you’re working to test system stability and Sapphire Ed told you to 😊
Now go enjoy your new gaming rig or that latest upgrade!
The articles content, opinions, beliefs and viewpoints expressed in SAPPHIRE NATION are the authors’ own and do not necessarily represent official policy or position of SAPPHIRE Technology.